| Disclosure: Just to be open and honest the buttons and links you click on in the website will in most cases take you to another website where you can purchase the products I am reviewing. As an Amazon Associate I earn from qualifying purchases. |
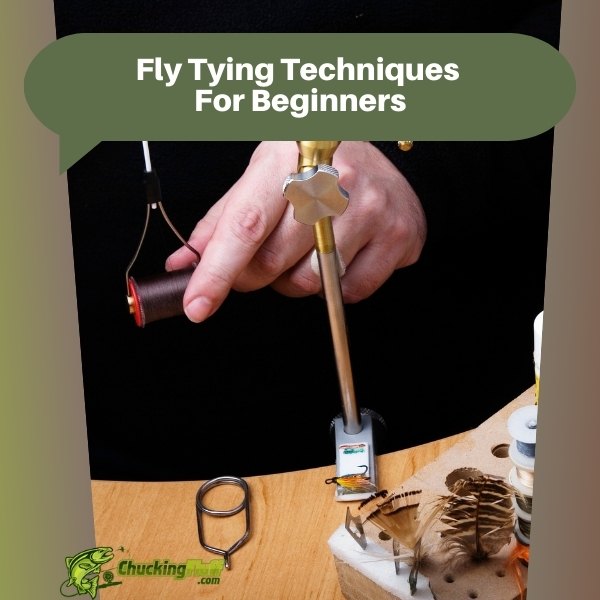
Fly Tying Techniques For Beginners – Steps to get Started
Quick Post Navigation
- Introduction
- What Is Fly Tying?
- Why Learn Fly Tying?
- Essential Fly Tying Tools
- Basic Fly Tying Materials
- Getting Started: Setting Up Your Fly Tying Station
- The Most Popular Beginner Fly Patterns
- Basic Fly Tying Techniques
- Advanced Techniques to Try Once You’re Comfortable
- Common Mistakes Beginners Make
- Tips for Fly Tying Success
- Conclusion
- FAQs
Introduction
So, you’re interested in fly tying. Awesome choice! If you’re just getting into fly fishing, tying your own flies is like leveling up your game. It’s not just about catching fish anymore—it’s about catching fish with flies you created. How cool is that? If you’ve been at it for a while but want to deepen your skills, this article will also guide you through the fundamentals and beyond. We’re going to cover everything from tools to techniques, plus the most common flies that beginners can easily tackle. Let’s jump in!
What Is Fly Tying?
At its core, fly tying is the process of using various materials—like feathers, furs, threads, and synthetic fibers—to create artificial flies that mimic the insects fish naturally eat. These flies are then used in fly fishing. Each fly represents a different stage in an insect’s life cycle, from nymphs that crawl along the river bottom to adult flies sitting on the water’s surface. Tying your own flies gives you complete control over your fishing game.
Why Learn Fly Tying?
You might be wondering, “Why bother tying flies when I can just buy them?” Well, there’s something incredibly rewarding about catching fish on a fly you tied yourself. Not only that, but tying your own flies can save you money in the long run, especially if you lose them often (and trust me, you will). Plus, tying gives you the flexibility to create custom flies that are perfectly suited to your local fishing spots.
Essential Fly Tying Tools
Before you start tying flies, you’ll need a basic set of tools. Don’t worry, you don’t need to spend a fortune to get started—just a few essentials.
Vise
The vise holds your hook steady while you tie your fly. It’s the centerpiece of your fly-tying setup. A good vise allows you to position the hook at different angles so you can tie with precision. You don’t need the fanciest one right away, but investing in a decent vise can make a huge difference.
Bobbin
The bobbin holds your thread and keeps it under tension while you tie. You’ll be using it to wrap the thread around the hook as you build your fly. It’s a small but mighty tool that helps keep your tying smooth and consistent.
Scissors
Good scissors are a must. You’ll use them for cutting thread, feathers, and other materials. Look for fine-tipped scissors to make precise cuts without snagging or tearing the delicate materials.
Hackle Pliers
Hackle pliers are used to hold small, delicate feathers (known as hackles) while you wrap them around the hook. They give you more control and prevent the feathers from slipping.
Whip Finisher
This tool helps you tie a whip finish knot at the end of your fly to secure everything in place. It sounds tricky, but once you get the hang of it, using a whip finisher will speed up your fly tying process.
Basic Fly Tying Materials
Now that we’ve got the tools covered, let’s talk about the materials you’ll use to create your flies. There’s a huge variety of materials out there, but we’ll focus on the basics to get you started.
Hooks
Hooks are the foundation of every fly. They come in various sizes and shapes, and the hook you choose will depend on the type of fly you’re tying and the fish you’re targeting. As a beginner, stick with standard sizes until you’re more comfortable.
Thread
Thread holds everything together. It comes in different thicknesses (measured in denier) and colors. For beginners, a medium-thickness thread in black or olive is versatile enough for most flies.
Feathers
Feathers, or “hackles,” are a key component in many flies. They add lifelike movement and texture. Most beginners start with rooster or hen feathers, as they’re easy to work with.
Furs and Synthetics
Furs (like rabbit or deer hair) and synthetic fibers are used to build the body of the fly. They add bulk and help mimic the natural appearance of insects. As you progress, you’ll experiment with different materials to get the perfect look for each fly.
Getting Started: Setting Up Your Fly Tying Station
Having a well-organized fly-tying station is essential for keeping your tools and materials accessible. A small desk or dedicated workspace will help you stay focused and make the process enjoyable. Make sure your area is well-lit—natural light is ideal, but a good lamp works too. Keep your tools organized with a caddy or magnetic strip so everything is within arm’s reach.
The Most Popular Beginner Fly Patterns
When you’re new to fly tying, starting with simple, proven patterns is the best way to build your skills. Here are four popular flies that are great for beginners.
Woolly Bugger
The Woolly Bugger is one of the most versatile flies you’ll ever tie. It can mimic anything from leeches to baitfish and is effective in both freshwater and saltwater environments. The pattern is straightforward, and you can experiment with different colors and materials to make it your own.
Zebra Midge
A simple yet effective fly, the Zebra Midge mimics tiny midges that fish love. This fly is great for fishing in slow-moving or still waters. It’s a minimalistic pattern, making it ideal for beginners who are still getting used to tying.
San Juan Worm
The San Juan Worm is about as simple as it gets. It’s basically a piece of red or pink chenille wrapped around a hook to resemble a worm. Despite its simplicity, it’s an effective fly and a great confidence booster for beginners.
Pheasant Tail Nymph
The Pheasant Tail Nymph imitates the nymphal stage of mayflies, which are a staple food source for many freshwater fish. This fly is a little more complex than the others but still within the reach of beginners. Plus, learning this pattern will introduce you to more advanced techniques like tying in tails and creating segmented bodies.
Basic Fly Tying Techniques
Once you’ve got your materials ready, it’s time to start tying. Let’s go over some essential techniques every beginner needs to know.
Threading the Bobbin
Before you can start tying, you’ll need to thread the bobbin. Pass the thread through the tube of the bobbin, using a threader if necessary. Pull a few inches of thread through the other side so it’s ready for use.
Starting the Thread
Hold your hook in the vise and start wrapping the thread around the shank of the hook to create a base layer. This helps the materials stick to the hook as you tie.
Tying in Materials
Whether it’s feathers, fur, or synthetic fibers, tying in materials is a fundamental step. Pinch the material at the base of the hook and use the thread to wrap it securely. Be sure to tie down each material so it doesn’t slip during fishing.
Creating the Body
For flies like the Woolly Bugger, you’ll want to create a thick, tapered body. You can do this by wrapping thread or dubbing (a mixture of fur or synthetic fibers) around the hook shank. Keep the wraps tight and even for a smooth body.
Wrapping Hackle
Hackle feathers add lifelike movement to your fly. Once you’ve tied in the hackle feather, hold it with your hackle pliers and wrap it around the body of the fly. Secure it with thread once you’re satisfied with the look.
Whip Finish Knot
The whip finish is the final step that secures everything in place. Use a whip finisher tool to create a series of wraps at the head of the fly, then pull the thread tight. Clip off any excess, and voila! Your fly is ready to hit the water.
Advanced Techniques to Try Once You’re Comfortable
As you get more comfortable with the basics, you’ll want to challenge yourself with some advanced techniques. Here are a few to try when you’re ready to up your game.
Dubbing
Dubbing involves twisting fur or synthetic fibers around the thread to create a buggy, textured body. This technique gives your flies a more natural appearance and is often used in nymph patterns.
Spinning Deer Hair
Deer hair is buoyant, making it perfect for creating floating flies like dry flies and poppers. Spinning deer hair involves tightly wrapping it around the hook and trimming it into the desired shape—perfect for adding bulk and flotation.
Using Beads and Weighting the Fly
Adding beads to your flies helps them sink faster, which is ideal for nymph patterns. You can also add lead wire to the hook before you start tying to give the fly extra weight.
Common Mistakes Beginners Make
- Using Too Much Material: Less is often more when it comes to fly tying. Overloading your fly with too much material can make it look unnatural and scare off fish.
- Inconsistent Tension: Keeping the thread tension consistent is key. Too loose, and the materials will slip; too tight, and you might break the thread.
- Rushing the Whip Finish: Take your time with the final knot. A sloppy whip finish can cause your fly to fall apart quickly.
Tips for Fly Tying Success
- Start Simple: Stick with basic patterns and master them before moving on to more complex flies.
- Use Quality Materials: Good materials make a huge difference. Cheap feathers and threads can be hard to work with and lead to frustration.
- Practice, Practice, Practice: Like anything, fly tying takes practice. Don’t get discouraged if your first few flies look a little rough—each one will get better.
- Watch Videos: There are countless fly-tying tutorials online. Watching an experienced tier can help you understand techniques much faster.
- Keep Your Workspace Clean: A clean, organized tying station will make the process smoother and more enjoyable.
Conclusion
Fly tying is an art that gets more enjoyable the more you practice. It might feel overwhelming at first, but once you get the basics down, it opens up a whole new world of creativity and customization. With the right tools, materials, and a bit of patience, you’ll be tying flies that can rival the best store-bought ones. Plus, the satisfaction of catching fish on a fly you tied yourself? Absolutely priceless.
FAQs
What is the easiest fly to tie for beginners?
The San Juan Worm is one of the simplest flies to tie, making it perfect for beginners.
How long does it take to tie a fly?
For beginners, it can take anywhere from 10-30 minutes, depending on the complexity of the fly. With practice, you’ll get faster.
Do I need expensive tools to start fly tying?
No, a basic starter kit with essential tools will suffice for beginners. You can upgrade as you improve.
What size hooks should beginners start with?
Hook sizes 12-16 are great for beginners, as they’re not too small or too large and work for many fly patterns.
Can I tie flies without a vise?
Technically, yes, but it’s much harder. A vise keeps your hook steady and makes the process smoother and more precise.

Why Are My Waders Wet Inside?
Do You Still Get Wet in Neoprene Waders?