
| Disclosure: Just to be open and honest the buttons and links you click on in the website will in most cases take you to another website where you can purchase the products I am reviewing. As an Amazon Associate I earn from qualifying purchases. |
Keeping Your Gear Dry And Protected With The Right Vest Or Pack

You know that sinking feeling. You’re halfway through a solid day outdoors when the sky opens up or you take an unexpected dunk. Suddenly your dry clothes, electronics, snacks, and carefully packed essentials are sitting in a soggy mess. A good vest or pack does more than just carry your stuff. It stands between your gear and the elements. Choosing the right one, and using it well, turns a potential disaster into a minor inconvenience. Let’s dig into how to keep everything dry and protected so you can focus on the adventure instead of damage control.
Why Dry Gear Matters More Than You Think
Wet gear is more than an annoyance. It can ruin a trip, damage expensive equipment, and even put your safety at risk. Once moisture gets in, it spreads fast. Electronics short out. Sleeping bags lose loft and warmth. Food spoils. Clothes stop insulating. And the extra weight of waterlogged items makes every step harder.
The Real Cost of Wet Equipment
Think about the price tag on your favorite jacket, camera, or multi-tool. One bad soak can cut years off its useful life. Mold and mildew set in quickly if things stay damp, and that smell never fully leaves. In colder conditions, wet gear can contribute to hypothermia. Even in mild weather, the discomfort of wet socks or a soaked base layer wears you down mentally. Keeping things dry is not just about comfort. It’s about protecting your investment and your ability to stay out longer and safer.
How Moisture Sneaks Into Your Setup
Water finds every weak point. Rain hits from above. Splashes come from below when you ford a stream or hike through wet brush. Condensation builds inside when warm air meets cold fabric. Poorly sealed zippers, open pockets, and thin seams all become entry points. Even “waterproof” gear fails if the closures are left open or the fabric has been abraded over time. Understanding these pathways is the first step toward blocking them.
Understanding the Difference Between Vests and Packs
Not every carrying system works the same way. Vests and packs each shine in different situations, and knowing which one fits your activity saves frustration later.
What Makes a Vest Ideal for Certain Activities
A good vest keeps weight close to your body and leaves your arms free. Anglers love them because tackle is right at hand. Hunters appreciate the quiet access to calls, ammo, and optics without swinging a pack around. Photographers and trail runners often prefer the balanced load and easy reach. Many modern vests include built-in flotation or high-visibility panels for water or hunting use. The trade-off is capacity. Most vests top out lower than a full backpack, so they’re best when you travel light or can cache heavier items.
When a Traditional Pack Outperforms a Vest
Once you need to carry a sleeping system, multiple layers, food for several days, or bulky camera gear, a pack wins. Proper hip belts transfer weight to your hips instead of your shoulders. Larger volumes let you organize with internal dividers and external lash points. Top-loading or panel-loading designs make packing and unpacking smoother on long trips. If your adventures regularly push past a day hike, a well-designed pack is usually the smarter foundation.
Hybrid Options That Combine the Best of Both
Some of the most useful systems today blend vest-style front pockets with a rear pack compartment. These give you quick access up front while still offering real capacity behind. They’re popular with ultra-light backpackers, guided hunters, and anyone who wants the convenience of a vest without completely giving up volume. Look for models that let you detach or compress the rear section when you want to go lighter.
Key Features That Actually Keep Water Out
Marketing language can be slippery. Focus on the features that deliver real protection instead of just sounding good on a hangtag.
Waterproof vs Water-Resistant: Know the Difference
Water-resistant fabrics shed light rain for a while but eventually soak through. Fully waterproof materials, usually with a membrane or coating plus sealed seams, create a barrier that keeps water out under pressure. For serious protection you want the latter, especially in the main compartment. Many quality packs and vests combine both: a waterproof body with water-resistant outer pockets for items you need to grab quickly.
Sealed Zippers, Roll-Top Closures, and Storm Flaps
Zippers are common failure points. Look for water-resistant or waterproof zipper tape, preferably with a storm flap that covers the zipper line. Roll-top closures, common on dry bags and some packs, create a tight seal when folded correctly and clipped. Magnetic or buckle storm flaps add another layer of defense. Test these features before you trust them in a downpour. A poorly seated roll top or a zipper left slightly open defeats the whole system.
Fabric Technologies That Work in the Real World
Ripstop nylon remains a workhorse because it resists tears and takes coatings well. Dyneema and other ultra-light laminates offer impressive strength-to-weight ratios and inherent water resistance. Some fabrics use durable water-repellent (DWR) finishes that make water bead up and roll off. These finishes wear out over time and need refreshing. Inside, a waterproof liner or a pack that accepts a rain cover gives you backup protection when conditions turn truly nasty.
Choosing the Right Capacity for Your Needs
Too small and you end up strapping things to the outside where they get wet. Too big and the empty space shifts, throws off your balance, and invites you to overpack.
Day-Trip Essentials vs Multi-Day Loads
For a day on the trail or water, 10–25 liters usually covers layers, food, water, and emergency gear. Fishing or hunting vests often fall in this range and keep everything accessible. Multi-day trips push into the 40–70 liter range depending on how light you travel and whether you need winter insulation. Measure the volume of your core items and add a buffer. Then choose a pack or vest that matches without forcing you to compress everything into a black hole of disorganization.
Weight Distribution and Comfort Over Long Hours
Even the most waterproof pack fails if you can’t wear it comfortably. A good hip belt and adjustable harness keep the load stable and transfer weight off your shoulders. Vests rely more on a snug torso fit and well-placed pockets so nothing swings. Try gear on with realistic weight inside before you buy. Pay attention to how the load sits when you bend, reach, or climb. Hot spots and pressure points only get worse after hours on the move.
Material Matters: From Nylon to Advanced Composites
The fabric is your first line of defense. Cheap materials thin out, tear, and lose their waterproofing faster.
Durable Fabrics That Resist Tears and Abrasions
Look for higher denier ratings in high-wear zones like the bottom and sides. Reinforced panels or ballistic nylon in contact areas pay off when you scrub against rock or brush. Some packs use hybrid constructions: tough fabric on the exterior and lighter material where abrasion is less likely. Stitching quality matters too. Double or triple stitching in stress points keeps seams from blowing out under load or when wet.
Breathability Without Sacrificing Protection
A completely sealed system can trap moisture from the inside. Body heat and sweat create condensation that soaks gear from within. Some advanced packs and vests use breathable waterproof membranes or strategic venting panels that let vapor escape while still blocking liquid water. For most users, a good rain cover used only when needed, combined with careful packing, strikes a practical balance. If you run hot or move hard in humid conditions, prioritize designs that manage internal moisture.
Smart Packing Techniques That Multiply Protection
The best vest or pack still needs smart packing. How you load it determines whether water that does get in stays limited or ruins everything.
Layering Your Gear Like a Pro
Put the most critical and most vulnerable items in the center, surrounded by less sensitive gear. Soft items like clothing can cushion electronics and absorb minor leaks before they reach sensitive gear. Keep a change of dry clothes in a dedicated waterproof sack near the top for quick access if you get soaked. Heavy items sit close to your back and low for better balance. Light, bulky items can go higher or in outer pockets.
Using Dry Bags and Stuff Sacks Effectively
Treat dry bags as your internal insurance policy. Color-code or label them so you know what’s inside without opening everything. Compressible dry bags save space while still sealing. For smaller items, waterproof stuff sacks or zip-lock style pouches work well. Don’t rely on a single barrier. Combine the pack’s outer protection with internal dry bags for anything that absolutely cannot get wet.
The Double-Bag Method for Critical Items
For phones, cameras, first-aid supplies, or paper maps, use two layers. Place the item in a small waterproof pouch, then put that pouch inside a larger dry bag. If one seal fails, the second still protects the contents. This method has saved more than a few trips when a zipper or roll-top didn’t seat perfectly.
Activity-Specific Recommendations
Different sports put different demands on your carrying system.
Hiking and Backpacking Solutions
Choose a pack with a solid rain cover and a main compartment that seals well. Internal organization helps keep wet and dry items separated. Look for external stretch pockets for wet rain gear so it doesn’t soak the interior. Many backpackers swear by a lightweight dry bag used as a pack liner for complete peace of mind in multi-day storms.
Fishing and Water-Sports Vests
Prioritize quick-drain materials and flotation if you’re around deep water. Multiple small pockets keep tools and tackle sorted and accessible with one hand. Waterproof phone and electronics pockets are non-negotiable. Some designs integrate tool holders and pliers sheaths so sharp items stay secure and dry.
Hunting and Tactical Pack Options
Quiet fabrics matter as much as waterproofing. Look for muted colors or camouflage patterns that also shed water. Large main compartments handle layers and meat hauling, while specialized pockets keep calls, rangefinders, and ammo dry and ready. Some tactical packs offer modular attachment systems so you can add or remove pouches based on the hunt.
Maintenance Habits That Extend the Life of Your Gear
Even the best vest or pack needs care. Neglect turns a reliable system into a leaky liability.
Cleaning and Re-Waterproofing Tips
Rinse mud and salt off after trips. Use a mild soap designed for technical fabrics when deeper cleaning is needed. Avoid household detergents that strip coatings. Once the gear is clean and dry, refresh the DWR finish with a spray-on or wash-in treatment. Re-apply according to the product instructions, then heat-set if required. Check seams and zippers regularly for wear.
Storage Practices That Prevent Mold and Damage
Never store a damp pack or vest. Hang it or leave it open in a well-ventilated space until completely dry. Avoid long-term compression in stuff sacks if possible. Keep gear out of direct sunlight and extreme heat when stored. A cool, dry closet or gear room is ideal. Check it a couple of times a year for any developing issues.
Common Mistakes That Leave Your Gear Vulnerable
People often trust the pack’s outer shell completely and skip internal dry bags. Others overpack and force zippers or roll-tops closed improperly. Leaving rain covers at home “because the forecast looks okay” is another classic error. Ignoring small tears or worn DWR until a storm hits turns minor issues into major ones. Finally, buying purely on looks or brand name without checking real waterproof features leads to disappointment when the weather turns.
Final Thoughts and Action Steps
Keeping your gear dry starts with choosing a vest or pack that matches your activity and capacity needs, then stacking smart features and packing habits on top of that foundation. Focus on real waterproof construction, reliable closures, and internal dry bags for critical items. Maintain the gear so its protective qualities last. When you get these pieces right, rain, spray, and stream crossings stop being crises and become just part of the day. Next time you head out, take five minutes to check your seals, pack the vulnerable items in dry bags, and confirm your rain cover is accessible. That small investment of attention pays off the moment the weather shifts.
Frequently Asked Questions
1. Do I still need a rain cover if my pack is already waterproof?
Yes. A rain cover adds an extra barrier, protects against abrasion, and keeps external pockets and straps drier. It’s cheap insurance when conditions get severe.
2. How often should I reapply durable water-repellent treatment?
It depends on use and washing frequency. Most people benefit from refreshing DWR once or twice a season, or whenever water stops beading and starts soaking into the fabric.
3. Can I use regular trash bags as emergency dry bags?
They work in a pinch for short periods, but they puncture easily and don’t seal as reliably as purpose-made dry bags. Treat them as temporary backup only.
4. What’s the best way to dry a soaked pack or vest quickly?
Open all compartments, remove contents, and hang it in a warm, well-ventilated area out of direct intense sun. Use a fan if available. Never put technical fabrics in a hot dryer unless the manufacturer specifically allows it.
5. Are more expensive packs and vests always more waterproof?
Not automatically. Price often reflects better materials, construction, and comfort features, but you still need to verify sealed seams, quality zippers, and proven waterproof ratings rather than assuming cost equals protection.
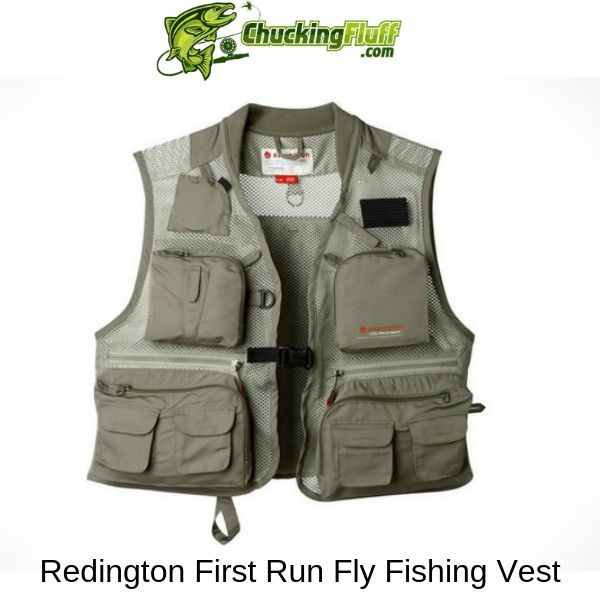
Redington First Run Fly Fishing Vest Review

Best Life Jackets for Fly Fishing
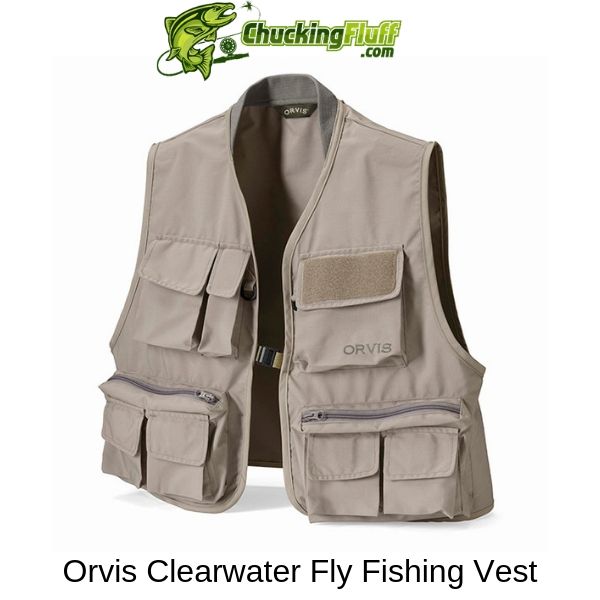
Orvis Clearwater Fly Fishing Vest Review – Classic Look, Upgraded
About Author
