| Disclosure: Just to be open and honest the buttons and links you click on in the website will in most cases take you to another website where you can purchase the products I am reviewing. As an Amazon Associate I earn from qualifying purchases. |
How to Set up your Fly Line – Beginners Instruction
How to Spool a Fly Reel in Steps.
Now that you have hopefully bought your rod, reel and line you will need to know how to set up your fly line and put it all together so you can go fly fishing.
Get Best Fly Fishing Reels Here
Fly fishing is a sport involving many skills, fly casting, river craft, entomology and knot tying among others. To be considered a proficient fly fishing angler you need to be able to be accomplish these with good precision. In this post we will walk through the task of setting up a fly rod so we can go fly fishing.
Quick Post Navigation
There are several steps to doing this task including;
a) Attaching the backing line to the reel
b) Joining the fly line to the backing
c) Adding the leader to the front taper of the fly line
d) Putting on our flies
e) Add water and go fly fishing.
What materials you will need is;
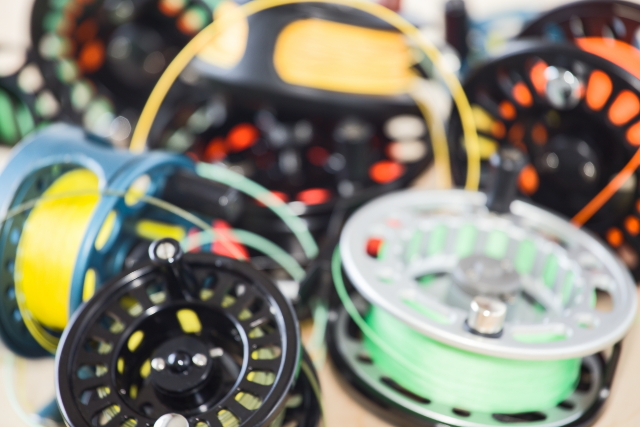
1 The Fly Reel, either a large arbor or regular spool reel.
2 Fly Fishing Line, in our case a weight forward WF5 floating line.
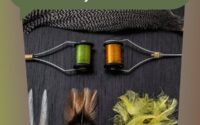
3 Spool of backing line at least 100ft
4 Braided Loop
5 Optional tube of Stormsure or Aquasure
6 Leader material
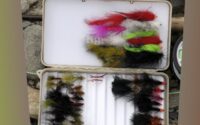
7 Flies
The first thing to do is load the reel with the fly fishing line unless you have purchased a kit with it already spooled on. The backing line
1) bulk up the fly reel to keep the fly line even and close to the top of the reel so it can be easily spooled on and off.
2) Its main purpose however is to allow the fish to take you on long runs if it chooses to do so. It’s important in your fishing line setup that you have this in place so you don’t loose fish.
How much line can you put on a fly reel?
A fly fishing line is normally 30 yards long and many fish species will want to run further than that so it is advisable to add as much backing line as your reel will allow.
If you are following the recommended start up kit here and purchased a 5 weight reel you will be able to spool on about 100ft of regular fly fishing backing.
I say regular as there are with all aspects of fly fishing many variations and these come in different dimensions. As thinner lines are more expensive I would recommend the basic backing line made from woven Dacron or braided monofilament which are more affordable.
Advanced Tip!
A good way to see exactly how much line you can hold on your reel is to first spool on the fly line and tie the backing to it with a simple knot and wind as much as you can until the line is close to but not touching the outer rim.
Then take it back off by either winding on to another reel or the spool it came from making sure you have cut the line at the required end. It takes a bit of back and forth but this means you will have the reel full to capacity.
Remember that you need to reverse the line before winding back on the reel and well worth the effort to get a reel to its optimum level.
What I do is reel it all onto the reel I’m using then off onto a spare spool then again onto another spare spool so it is now turned and ready to be wound onto the reel it’s intended for again.
To be clear there is a right way and a wrong way to spool fly line on and off a reel. If you hold the fly line on the spool it came with you will see it is wound a certain direction around the spool.
You need to unwind and direct that line onto a reel in the opposite direction so it winds around the spool neatly and not against itself. So if you are looking at both the reel and spool connected together the line is flowing nicely from one to the other without becoming twisted.
Whats the Best Knot for Attaching your Backing to the Fly Reel?

Once you have the line reversed you can start to add it in the correct order backing first followed by fly line. The backing to reel knot that I prefer is the arbor knot. This knot is very simple to do and very safe.
Once tied on wind the backing on in even turns laying it down flat on the reel as best you can. If you take your time you will get it to lie flat and neat. If you are using the more expensive backing lines these are thin and really easy to wind on without much effort.
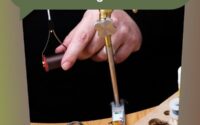
Next we have to know how to attach fly line to backing. This is where we need to be careful as a badly tied knot will not only loose the fish but possibly the fly line as it goes flying off the reel into the water and away after your prize fish. The knot regularly used here is the nail knot.

It has great strength and when mastered correctly will sit nice and flat on the line. Hywel Morgan has also a handy tip in the video for connecting braid to fly line, I have used it successfully on a fly fishing trout setup but not so sure about salmon or larger target species.
Tip! Get some fly tying thread and run consecutive turns over the nail knot connection and run a couple of layers of quick drying varnish to form a very smooth finish.
Important when you are targeting species that will take you into backing line regularly you don’t want to have a huge knot bumping through your rings as it will break at some point.
OK now that is done and you’re sure of its connection wind the fly line onto the reel. Take your time and wind the line in even rows on the fly reel spool. This makes for easy stripping of the line for casting and for fish playing.
Now you will have come to the end taper of the line where we need to attach our leader. An easy way to do this is put on a braided loop on to the fly line which leaves the end with a nice loop so leaders can be attached whenever we go fishing easily with a loop to loop connection.
How to tie leader to fly line will become a regular task when going to fly fish so learning how to do this consistently and well is very important. As I have said before in other posts the weakest part of any fly fishing line setup is the knot so get it right.
The other way to do it is a simple hand over knot on the end which has been used successfully down the years before braided loop
One thing to consider if you are targeting easily spooked species like wild brown trout the braided loop can cause tiny air bubbles to be released from the end of the fly line when retrieved and this can put them off. In cases like that I would use a nail knot to attach the leader. For most cases the braided loop is fine.

Another Tip! When the loop is attached use some Stormsure adhesive
The storm sure is flexible and made for water repairs so ideal for the situation. If you are targeting larger species make sure the loop is securely fastened I would recommend a nail knot of monofilament line equal to the weight of the desired catch. Example targeting Salmon up to 20lb then use 20lb mono and run the knot around about eight times. I have found loops secured this way are super strong.
Remember your set up is only as strong as the weakest link so double check all connections regularly. If in doubt redo them to make sure you don’t lose that fish of a lifetime.
Don’t be intimidated by making these connections, with a bit of practice and patience you can master them, which at the end of the day is all part of the sport.
While working in the tackle shop it always surprised me how many anglers didn’t know how to attach loops or make connections properly relying on their mates or us to do it for them. We didn’t mind it was all part of the service but for me personally I would rather blame myself and not someone else if I lost a good fish to a knot breaking.
Now that we have the loop on its time to attach the leader. This can be done a few ways but I would always use a loop to loop  connection so I would form a water knot (or surgeons knot) at the end of the leader to connect it with. The formation of the leader is another problem which we will tackle in another post.
Now that the leader is on before we can go fishing we need to put on our flies. However we need to put the rod together and feed the line up through the eyes before we do that.
I simple tip I have used is when feeding the fly line up the rings is to bend the line in double for a few inches say 6-8. As you feed it gives you something a bit bigger to hold as you go. Now if you let go of the line by accident which happens all the time the doubled over line will not slip the whole way back down to the butt section meaning you have to start all over again.
Once the line and leader is free of the tip ring pull through a few feet of the following fly line before we start to attached out flies.
It will depend on your setup how many flies you are attempting to fish for a beginner I would recommend only one but two can be fished fairly easily if you can keep your casting in line.
In some cases I have seen guys fish 4 or 5 flies at a time but for me I create more tangles than I’m happy with so 2 is a normal setup for me.
Depending on the size of the fly there are different knots to attach them to your leader. I wouldn’t get to indecisive on this for now but concentrate on 1 or 2 knots to use and learn them well. You will be surprised how you can forget how to tie a knot you learnt the evening before in front of the computer only to be at the river side trying to change a fly to a rising trout and not remember. Its times like this that knowing at least one good knot is essential or that trout could be long gone before you get the fly tied on.
For me the simple clinch knot for trout flies and the double turle knot for salmon flies is all I need. I have tried a few other also but seem to revert back to these every time I go fishing. They have stood me well over the last thirty six years of fishing.
Time to go fly fishing
So once the flies have to attached it’s time to add some water and go fly fishing. 🙂 This is not a definitive list of spooling your fly line and getting ready to go fishing but a setup I have used over and over again. I have set it up for many clients who came into our fly shop and friends over the years so I can vouch that it works.
You will of course as you develop into the sport come into new ways of attaching and spooling on lines and these you need to test for yourself. After all there is more than one way to do it so don’t be afraid to vary things and try them out. I just know that this has worked for me up to now.
Practice makes perfect
I think the most important thing to remember here is to make sure you practice your knots over and over so you can do it automatically. The better you become the better you will be able to change a fly fishing setup at the river back and the easier it will be for you to catch fish which is what it is all about.
Hope this guide helps you in some way please feel free to ask any questions on the subject below in the comments or by emailing me directly. I will do my best to find you a solution.
Need more info on fly fishing check my review on fly fishing unleashed!
Tight Lines!
Exploring Different Fly Box Brands – Top Sellers
Exploring Different Types Of Fly Materials
I have never been fly fishing before, well when I was 8 or 9, but that doesn’t count. I do fish, but setting up my own fly line has been pretty foreign to me. Love watching people doing it from the middle of the river when I’m on the shore.
I read this post to see if i could be educated on this and I think next summer I might try instead of being left out.
thx
Hey Stew, if you have fished before you will be able to handle the knots i’m sure. The information is all there on how to setup the fly line so you can follow it and hopefully you will be fine. Any problems come back to me and I’ll see where I can help. If not totally confident on doing it your self a good way to get started is to purchase a combo kit. We have reviewed many in the website and as they are already setup it takes all the guess work out of it.
Me and my dad were LITERALLY JUST talking about fishing today! He’s waiting on some kind of AARP discount thing to come in the mail. lol. I’ve never attempted fly fishing before but have always been intrigued by it. I had no idea that a typical fishing line is over 30 yards long! That’s nuts!Thanks for including the video too. Super super informative. I thought I’d only been watching a minute or two and looked at the time and the video was almost over! I learned a lot! Thanks! I’ll have to show this vid to my dad-as soon as he hears from AARP. 🙂
Great to hear you and your Dad are gearing up to go fly fishing, time spent with family on the water is time well spent. The video is easy to watch that is true and it makes a lot of sense to those who are not happy following written instruction.
Thanks for this great instructional post! I am a learner to fly fishing but am keen to get started. I already have a couple of rods and want to give fly fishing a go. I have a question regarding the line. Is it ok to use nylon line, and if not, what are the reasons?
Hey Rina, nylon line is ok for the leader where you tie on your flies but the main line needs to be a fly line a specially profiled and weighted line to load the fly rod to make the casts. There is more on the subject of fly lines here.
Hello. I’ve never tried fly fishing before but I do want to in the near future! I have fished all of my life. I would like a guide that tells me about how to fly fish in the water & where the best places are (rivers, lakes, creeks). I do hope to use this one day! Most people have a hard time fishing in general because they mostly aren’t patient! Haha. I do look forward to more instructions on your site! Rachel
Hey Rachel great questions. I have done several posts here on the website to help with new fly anglers. Here is a list of what you can find.
Matching the Hatch using flies to match whats hatching on the river
Dos and Donts A guide of what to do and not to do.
Rainbow Tips Some tips on stillwater rainbows
Trout fishing with a fly rod series of 5 posts
Polyleaders Depth control
Beginners Tips Getting started
River Tips How to work a river
Techniques Some basic techniques
Stillwater Tips How to fish slow water in winter.
Casting Clinic Series on different fly casts
There’s a taster of what you can find here with loads more to come so keep coming back.
Hi there,
I have to say that as a newbie in the area of fly fishing (I tried it once), I struggle quite a lot with setting up my fly fishing rod ( it’s one of the reasons I avoid fly fishing so much… ). However, after reading all those instructions (many of which I find to be quite easy to follow)… I think to give the fly fishing a shot and try it once again.I must also say that if a newbie like me understands all the information above, you did a GREAT job… this article will certainly help a lot of beginners like myself! Highly recommended read if you want to learn and understand some of the basics of fly fishing!
Cheers,Nick.
Thanks Nick always glad to help. Some aspects of fly fishing can be daunting for the beginner so I have tried to break it down and make it simpler.
I’m not a fisherman myself, well I love to watch it but I’m to unpatienced for it, however a friend of me is a fisherman, but he is always struggling doing the lines, the knots and so on. He loves flyfishing but every time he does it it ends in a catastrophe, you have to see it. I will show him this site, pretty sure it will help him.
You have an advice which Fly Reel he should use?
Emmanuel I have put together a post on some of the best fly reels on the market ans also a post on how to choose a fly reel. Both of these should help him decide which reel he needs.
I live in a seaside village and I recently decided to move from beach casting fishing onto fly fishing, as there are a number of freshwater lakes less than an hour away from me.
Thanks so much for this article, it clears a lot of things up for me, but I am still struggling to get a new line on my reel from the offset and I was wondering if you could cover this in a short reply for me?
Sorry to ask – but I am a complete newbie at fly lines!
Thanks in advance,
Chris
Hey Chris which aspect are you struggling with. As I have put the process together from start to finish I need more info into where you are struggling. Is it the knots, the amount of line to go on the reel etc?
Thank you so much for the refresher. I have been wanting to get back into fly fishing and some of the basics have escaped me. It’s been a long time since I have tied any knots, so this is great information.
I used to fish a lot when I was younger, but kids, work and other activities have taken priority. Now that the kids are older, I am realizing I need to rekindle my interest in fishing. I need a hobby!!
I will definitely check out some of your other posts, I am in need of a new fly rod as well. Do you have any recommendations for a beginner/intermediate level caster? I am sure once I get back out there it won’t take long to get the hang of it again.
Hey Steve, once you are out there doing it again it will come back to you i’m sure. It’s like riding a bike as they say. With a bit of practice it will get easier. I did a post of some of the best fly rods on the market especially for those starting out hopefully you will find something of interest there.
Hey there!
This guide is just what I need. I grew up in Bermuda fishing off the rocks without a fishing rod. The funny thing is that we could NOT figure out how to use it! LOL. Your instructions are very clear and easy to follow. I also appreciate having the materials list. So even though this is fly fishing I feel better educated about how to use a fishing rod. So my question is what’s the difference between fly fishing and fishing off the rocks?
Thanks!
Marlinda
Hey Marlinda, you can find out all about fly fishing in this post. It gives a bit of history and what is entailed in the sport.
I used to go fishing a lot more often than I do now, but I never quite got around to trying out fly fishing myself (although I did go to a local pond on holiday once and watch my uncle fly fish). It looks like a lot of fun, but one problem was that it also looked complicated. Thanks to this guide, I know exactly which steps I should take if I decide to give it a go in the future. Do you think any of these steps can be left out or are they all integral? Thanks.
Hey Danny if you are not really set on making the connections yourself you can always buy a fly fishing combi kit which comes setup right out of the box. No need to work out how to do the knots it all done for you and the rod is perfectly balanced ready to fish.
Thank you for the great instructions. My only time fishing was back when I was a child/young teenager. Maybe I need to find time to start all over again. Used to be my dad who helped me with the tackles, baits and knots.
Now I really need to get my basics right on track first before trying out your techniques.
I would recommend it Janrell if you have tried fishing before you will love fly fishing. I hope as you can see from the videos and instruction that its not really that difficult.
Once you are confident with the knots its just a matter of time practicing on the water with the fly rod casting before long you will be catching trout for fun.
Mark, I have never really understood fly fishing until now. I could never really figure out why slapping the water with a neon line would attract fish, but now I am a believer! You explain everything so simply and thoroughly, even an old bass boat guy like me can understand it. After watching your videos, I think I might make a go of it. Thank you for helping me to get the jist of it all.
Clay
No problem Clay, the idea is not to slap the water with the neon line but to gently caress it. 🙂 It really is a great way to fish and as a bass angler you can target them too with a fly fishing lure.
I hope as you can see from the videos that setting up your fly line doesn’t have to be difficult.
Hello Mark,
I love fishing, I have been fishing for many years especially in the sea and some lagoons here in Argentina. Watching your video I have to congratulate you because I can appreciate very well how to make a very good knot between lines.
I hope in the near future to learn all the secrets of fly fishing.
I have been told that both trout and salmon are fish that offer an intense fight, what do you think?
Any questions I will contact you again. Good Fishing Friend!
Trout and Salmon both give a great fight when caught on a fly rod. It’s important to make sure your knots are properly done as a weak know will loose you fish.
Hey Mark,
It has been close to 35 years since I done any any type of fly fishing. I never go the chance to to a lot of it even then. Most of my fishing was off a regular rod and reel
Your step by step post is absolutely great, especially with the added video. You present all that anyone needs to either learn how to do their own set up to fly fish, and it by all means is a great refresher for someone that has forgot how to do their own set up.
It was great to just read through and remember…
Ted
Hey Ted 35 years don’t you think its about time you got back to the water? LOL! 🙂
Hi Tommo!
Thank you for this insight on how to set up the fly line correctly. I would love to see a picture of yourself fly fishing. Do you think you can share one? Would be a great motivation for us readers 🙂
Is there a favorite fly fishing place you want to share with us? I would be super interested in.
Catch a big one
Johann
Hey Johann the picture of me on my about page is at the Yokanga River in Russia, fishing for Atlantic Salmon with big rods and lines. It is something I wanted to share on here for a while so I may just get a post sorted soon.
Well, it has been years since I have actually set up a fly line. I did this a lot when I was a kid, but I needed a refresher. Your step by step approach is awesome and I love the video and pictures you included. I am sure I will turn it around quickly and be tying knots with my eyes closed. Okay maybe not with my eyes closed, but you understand where I am coming from. I am really looking forward to getting out and hitting the streams this summer, and I am trying to be as prepared as possible.
One side note, I used to tie my own flies when I was younger, do you have some advice or a “how to” post for that? I could use a refresher!!
Thanks for sharing, this is fantastic.
Hey Steve with a bit of practice you will be tying knots without problems in no time. Great you have taking up the sport again you will fall in love with it again i’m sure.
As for fly tying I used to tie all my own flies as a youngster, I even sold some to a local tackle shop to make some money to buy gear. Was a nice wee earner for me.
Now it’s much easier for me to buy them before going to fly fish however I have recently built a new shed and put in an area for fly tying so this winter I hope to be getting back to the vice.
As a great resource for fly tying the youtube channel of Davie McPhail is awesome, he has hundreds of videos tying some great fly patterns. Fully recommend it.
Great article! I have always wanted to learn how to fly fish. I have always heard that it is hard to learn how to do. It also looks hard. So needless to say that I didn’t know that there was a certain way to put the line on your fly fishing reel. Thanks for the info.
Great article! I have always wanted to learn how to fly fish. I have always heard that it is hard to learn how to do. It also looks hard. So needless to say that I didn’t know that there was a certain way to put the line on your fly fishing reel. Thanks for the info.
Yes there is a certain way to put your fly line onto the spool. Just did another one myself yesterday, took the fly line out clipped it onto a vice with a screwdriver through the middle of the spool and wound it onto my reel, then attached the backing loosely and wound on until the reel was full. Took off the spool and put a new one on (came with 3) and wound the backing back onto it. Attached the fly line correctly and wound it onto the same spool. Now the reel is full to capacity attached a leader to the front end and I’m ready to go fishing.
In these articles on “How to Set Up Your Fly Line” we will find in our pictures, tutorials and video tutorials a summation of tips, procedures and useful applications to know how to prepare ourselves for this type of fishing. Although I am a beginner in this field, I think it is rich and rich in many knowledge that can enrich the methods, notions and ways you will fish from now on. Thanks to Mark, for the time devoted to both the video and the composition of the article, a great deal of information and teachings about fishing applications
That ebook offer seems attractive, I’m not into fishing that much but I definitely have some friends who go hardcore about it. And setting up a fly line can go wrong if you don’t know how to do it.
That’s why I will advise them to check out your website 🙂
Yea setting up a fly line for the first time can be awkward for the beginner, that’s why I tried to lay it our here so anyone can follow it. With a bit of practice it becomes second nature and a skill every angler should have.
As with your page on different flies, this was very well presented! The steps involved to do anything in fly fishing can be interesting to say the least, especially to a beginner. You take the time to properly break everything down and present it in an easy to understand fashion. Good on ya, mate!
Spooling a fly line onto a fly reel can be a bit daunting for the beginner so I have tried to set it out in a practical manner so a person with any skill level can follow.
Connecting fly line to backing and to your leader involve two fishing knots that if not done correctly can lead to losing fish or your expensive fly line. A bit of practice can make the job so much easier and always remember my tip to moisten your knot before tightening. A simple point but when left out will weaken the knot immensely.
Hiya,
Thanks for your informative step by step guide on setting up a fly reel.
I haven’t mastered fly fishing yet (not due to a lack of trying) but your steps are logical and have filled in the gaps.
Also thanks for your tip on the Storm sure adhesive – I’ll definitely give it a go!
Regards,
Joe.
Great Joe glad you got some help from it. Fly fishing is like most sports where the more you put into it the better it gets and being able to connect up your fly line and spool it onto the reel is a big part in the process.
Stormsure is a product I try to keep with me as it comes in handy for all sorts or issues. I have included it in my emergency kit items to help save the day.
I found your article very informative on how to set up your fly line. This is ideal for anyone but especially for beginners like myself..
I have fished before but never done fly fishing. I didn’t realize how much goes into setting up a fly line. I found the step by step process easy to follow & understand. Is this the easiest technique to spooling a fly line?
Thank you for sharing this helpful info.
It’s the easiest one I know to spooling a fly line onto a fly reel. We don’t need to get technical with fancy knots and try to put beginners off do we. It’s easier to make it simple and straightforward.
Knowing a few knots and how to tie them correctly makes the task of fly fishing so much easier.
I am a fisher-woman 🙂 at heart and have done plenty of it in my life, but I’ve only gone fly fishing twice in my life and absolutely loved it. You make a fly fishing technical discussion understandable and I really enjoyed reading it. It is very helpful. I was fly fishing in Alaska in the Dillingham area many years ago and caught every species of salmon in 3 days. I was in heaven. Carry on and keep helping people learn how to do it. What a life long worthy skill to have and one to pass onto others. Merry Christmas.
Appreciate your stopping by, making the technical aspects understandable is not easy at times, what I can do with my eyes closed is not always easy to put down in type and make others understand but I do try and see it from a beginners point of view.
Spooling a fly line can be tricky when not used to it and you don’t want to lose a new line to a faulty knot on the river. Hopefully this tutorial makes it easier for fly anglers to spool their own fly lines unto rods and reels.
Would love to get to Alaska to chase some silver. Been to Russia myself and had fun casting for the Atlantic version of those Alaskan cousins. Big rivers, big rods and big flies may do a post on here soon about it.
Very technical article about setting up fly lines and I have not seen any articles about fishing technology before.
I think all fly fishing novices should read your useful article, which is a great help to improve their fishing skills.
Previously I only tried to catch fish with a large net, and it is easy to catch a lot. Fly fishing is very much different, it is a more complicated way of fishing I have not tried but it looks like a lot of fun.
A lot of fun yes. As I say there is more to fishing than catching fish and learning how to put together your fly line, leader and flies and then go and learn how to cast is a lot of fun.
The more you put into the pass-time the more you get out of it.
A good idea for those beginning is to get a fly fishing kit which has most of the tackle already setup then you can learn as you go.
What an incredibly informative article, I really enjoyed reading this. Love the pictures and imagery. I think anyone looking for info on fly fishing should come here immediately because this is the best source I have ever encountered.
I haven’t fly fished before, but all I can think of is getting out on the water on a beautiful Summer day and enjoying it with friends. So peaceful.
I enjoy fly fishing at all times, a nice summer evening is a good time. Especially when it just starts to get dark the trout will be in frenzy of feeding trying to get the last morsels of food before darkness falls.
It can be all over in a few minutes but having the fly line setup correctly will ensure you are still fishing during this magical time.
Very informative article and easy to read. Great pictures and placement. Overall I think anyone looking for information on how to get set up for fly fishing would benefit greatly from reading your page.
I’ve never fly fished before, but thanks to your article it’s now on mt list to try! I might have to hit you up with more questions come the spring.
No problem Marty ask away I am only too happy to help if I can. There are more posts on the website written for the beginner starting off including this series on how to fly fish.
Its a great sport and pastime, my happiest hours are on the banking with my fly fishing rod.
Thank You
Your article brought back the urge to learn to fish with a fly rod, I never tried but I have always had an interest in the challenge to hook a big one with a fly rod.
My youngest son used to make flies as a hobby, we used to go fishing all the time. Now he is grown up and lives far away, I have not been fishing since he moved away
Hey good to hear from you. I would suggest you get the rod out of its tube and take it to the river, you know it makes sense.
I have two young boys now and am looking forward to training them to fly fish up to now we have only ventured out with the spinning rod to get them used to the river side but we are working up to the fly rods.
Looking forward to many days enjoying watching them catch trout on the fly.
Fishing fascinates me. I was raised on a farm and there was never much time for fishing. Then I married into a family with a lake house. I learned more about fishing then. It did not, however, make me love fishing.
I learned to do the set up for the kids with tying the knots when they were little. I certainly could have used a couple of the knots you have illustrated here.
I also liked your step-by-step approach to loading the reel. That was my husband’s job. But, I think I could do it after reading your article.
I will share this site with my husband.
Great Jan, nice to hear from a lady who may not love fishing but is prepared to tackle up for her family.
My wife is not that keen and wonders what all the fuss is about especially when I come home empty handed, However she is prepared to help get the boys ready and has come on a few outings with us all be it with a good book.
She does love to see the kids faces when we catch something, that does make her day. As I say there is more to fishing than catching fish, getting out into the outdoors and having fun is great family bonding time.
Thanks Mark all I need to do now is catch some fish !!! very helpful indeed
Your most welcome Steve, glad I could help. Tight Lines!
Thanks Mark this is some very useful information. I used to really be into knots right from boy scouts through a tour in the navy. Reminds me of a local boat on somebody’s lawn named “Knot For Sale.”
I bet you know some useful knots Jim after a tour in the navy! The thing about them is they can come into use in everyday life not just for fishing hunting or sailing. I think everyone should know at least half a dozen knots for everyday use. You would be surprised how many people cannot even tie two ropes together effectively.
Ah the arbor knot I know it well I use this knot to tie my line to the arbor of my reel, fishing and knots go hand and hand….
Exactly Tim hence the name Arbor. A very simple knot but most important to load line on the spool.
Hey there! I got to go fishing while in Idaho. Was so great to have some relax time and enjoy the outdoors. Thanks for the how-to article.
Hey would love to hear of your adventure what species were you after and did you get any? Thanks for stopping by!
Great info. I’m like Ty, I love knots but never remember how to tie them when I need them. Maybe I need to download these videos to my Ipad and take it along
That’s an idea, however there are several pocket books that sit neatly in your pocket and have most of the most commonly used knots. Great to have handy!
Tying knots always gets me confused but as long as I keep at it I can do it from memory, I guess it is pretty similar to tying shoe-laces
There is a knot for every situation Dom and learning them all can be a lifes work. However learning a few basic ones well can come in handy for many situations never mind tying your laces. When it comes to fishing knowing how to tie your knots well can be instrumental in landing that big fish.
That nail knot demo was really good! I’ve never seen that before. That could have uses other than fishing. Thanks for the tip!
Sure enough Doug knots can be used in all manner of things. My knot skills have come in handy when taking waste to my recycling center in an open top trailer.
Wow thats a lot of info. Very informative
Thanks for the comment. I am trying to fill in the gaps for anyone starting out. If I have left anything out just leave a comment and I’ll get back to you.
Very methodical approach. I have never fished but your article made wanting to fish 🙂
Hi Anindo, thanks for the compliment. If you are located close to a fishery river or lake I would advise you take up the sport. It will not only get you out in the fresh air but it will give your mind time to think subconsciousness and those problems or tasks you are trying to work out will get solved. Believe me its happened to me more than once. Plus I love it. 🙂
Nice post, I love knots, ever since I was a kid I have been fascinated with them. I forgot most of it now but that’s life lol
Thanks for the comment Ty, knots can be useful in everyday life not only fishing. It does pay dividends to know a few for everyday use.