| Disclosure: Just to be open and honest the buttons and links you click on in the website will in most cases take you to another website where you can purchase the products I am reviewing. As an Amazon Associate I earn from qualifying purchases. |
How to Fix Damaged Neoprene Wellington Boots
You are probably well aware that neoprene wellington boots are not cheap. In fact you can pay in excess of £200 for some of the top brands.
With a price ticket like that you want to get the most wear out of them as you can.
In the top brands wearing them out can take some time which is good news.
For instance I have a pair of Toggi Wanderer Plus and have been wearing them for 5 years now.
I go fishing and walk my two dogs in them and haven’t had any problems up until this last year when I cut a small crack in the upper foot on one and a small crease in the gusset flap on the buckle section on the other.
Although I am fairly careful in the wearing of my wellington boots it’s not always easy to keep them unscathed when chasing your dog out of a river or over rocks and the like.
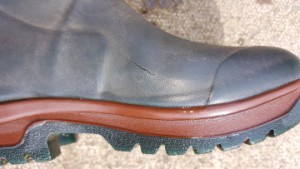
Neoprene Boot Crack
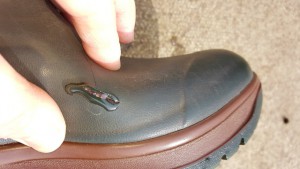
Pushing-the-boot-open
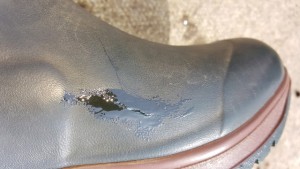
First-layer-covering-the-crack
Rather than throw them out as the tread is still good I decided to do a repair on them instead.
Afterall £90 for a new pair is a lot more than I want to pay right now and a tube of stormsure aquasure is only £6. OK so onto the repair.
The first step in repairing the neoprene wellington boot was to make sure they were reasonably clean as the sealant I was going to use needs a clean footprint to cure properly.
I simply got a cloth and washed the boots all around the damaged area and rinsed them off several times.
I then let them dry off to ensure no water remains to upset the sealant curing.
Next, I opened the sealant and run a small drop along the crack in the wellington boot opening up the crack to ensure the sealant got right in there.
I rubbed this with my finger which was covered with the plastic bag glove that came in the stormsure sealant pack.
Once happy it was well covered I left to cure laying flat so the sealant wouldn’t run too much.
On the pack, it states it takes 2 hours to be touch dry and 10-12 hours to be cured completely depending on atmospheric conditions.
I left it for a couple of hours then put another layer on over the hole and pushed in around the edge leaving a good border around the crack. This was also left to cure.
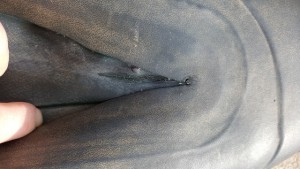
Gusset washed and dry
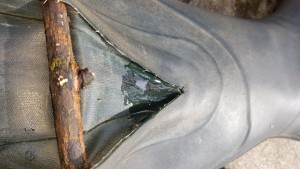
Stick-keeping-the-gusset-open
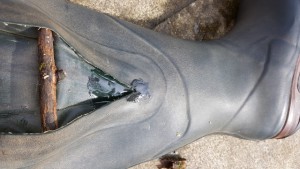
Stick-for-gusset
On the other boot which had the leak in the gusset I put in a piece of wood to wedge it open and got to work rubbing in the sealant into the cracks.
Again leaving to dry for a few hours before adding another layer.
Both boots were left to cure overnight before using.
To test I took them to the beach where I normally go to walk the dogs.
I stepped into the water and gave it a few minutes to test if there was a leak.
Happily, the sealant was holding and no water got it.
Another pair of boots saved from recycling and will hopefully give me another few years of happy walking and fishing.
The benefits of this flexible sealant are it moves and flexes with your foot and doesn’t crack like other glues or patches.
I find stormsure great for these holes and also for loads of other applications including when putting on braided loops onto my fly line.
Fixing my breathable chest waders along with other useful patching work like camping tents, waterproof clothing, groundsheets, leaky seams, wetsuits, inflatable toys, airbeds, and loads of other materials.
After using your stormsure make sure to put on the lid tightly place in a plastic bag and put into your freezer, that way it will not cure in the tube and spoil.
You can simply bring it out, let unfreeze and re-use for another time. It will keep this way for quite some time.
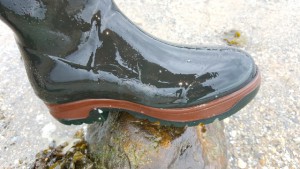
Success-the-boots-are-fixed
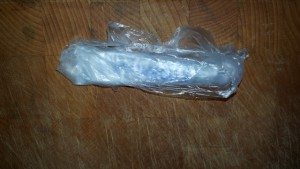
Stormsure-wrapped-in-bag

Stormsure-going-into-freezer.
Alternative McNett Aquasure Here!
“Check out some of our Buying Guides”
