
| Disclosure: Just to be open and honest the buttons and links you click on in the website will in most cases take you to another website where you can purchase the products I am reviewing. As an Amazon Associate I earn from qualifying purchases. |
Fly Fishing Nymphing Techniques: A Beginner’s Guide
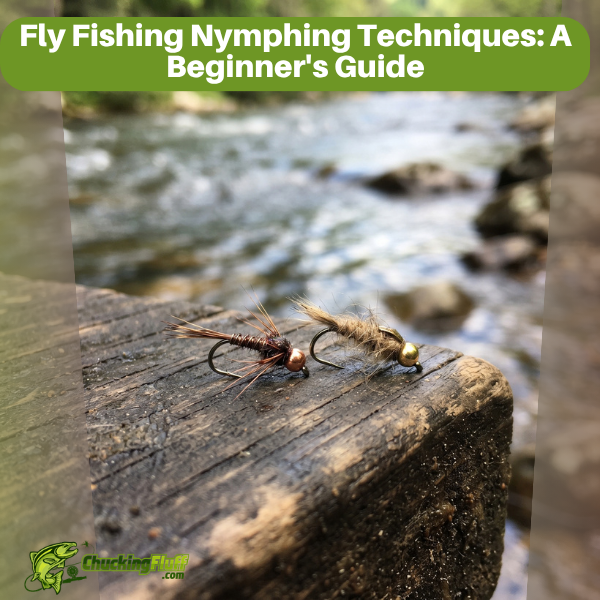
Nymphing is a super fun and rewarding part of fly fishing, and it’s honestly a real game changer if you’re looking to catch more trout. For beginners, the idea of fishing nymphs—small bugs living below the surface—can seem a little confusing at first. But once you get the basics down, nymphing opens up a whole new world of possibilities on the water. In this guide, I’m breaking down the nitty-gritty of nymphing, covering everything from gear to popular rig setups, so you can hit the river with confidence and start getting bites in no time.
Nymphing Basics: What You Need to Know
Nymphing means using flies that imitate insects living underwater. Most fish feed below the surface, so nymphs actually match how trout eat for much of their lives. If you’re a beginner, starting with nymphs gives you more chances for action, even when you don’t see fish rising or insects hatching.
Nymphing’s roots go back a long way, but the techniques have changed over the years. Nowadays, there are lots of different nymphing styles and rigs, but the basics haven’t changed: present a small, subsurface fly that looks and acts like a natural nymph and you’ll fool more fish.
Why Try Nymphing as a Beginner?
Most trout are feeding underwater, so using nymphs works during most of the season. Nymphing is also great if you’re fishing a new river and don’t see fish on the surface. Even when the river is crowded, nymphing lets you target spots others might ignore. Plus, the gear setups are pretty forgiving for beginners, and you don’t need fancy casting techniques.
One thing I noticed when I first started is that even when nobody was catching fish on dries, nymphing got bites. It’s nice to see your indicator dip down and know you’re learning to read the river, not just waiting for perfect hatch conditions.
Essential Gear for Nymphing: Getting Set Up Right
You really don’t need loads of expensive gear to start nymphing, but a few things will make life easier and more fun. Here’s what’s in my nymphing starter kit:
- Fly Rod: A basic 9 foot 5 weight rod is perfect for most beginners. Some folks like a 10 foot rod for extra reach, but a 9 footer works just fine for most places.
- Fly Reel: Nothing too fancy here, just make sure it balances your rod and holds your line.
- Fly Line: Standard floating line, since nymphs are light and you’ll fish shallow to moderately deep water.
- Leader and Tippet: Go for a 9 foot tapered leader down to about 4X or 5X tippet. Thinner tippet lets your nymphs drift better.
- Strike Indicator: This is a small float that helps you spot strikes. For most people, foam or yarn indicators work great.
- Split Shot or Weights: These help get your nymph down where fish are eating. Pinch them above your fly.
- Nymph Flies: Start with a few classic patterns, which I’ll share later in this article.
Having a small net, waders, and polarized sunglasses is nice too. Sunglasses help you spot fish or see underwater hazards, and a net makes landing trout smoother, especially when you’re fishing barbless.
Understanding the Nymph’s Life Underwater
Knowing how nymphs act in the water helps you pick the right flies and present them correctly. Most nymphs spend months underwater crawling along rocks, clinging to weeds, or drifting with the current before hatching into adults. They aren’t strong swimmers, so natural drifts with no drag are really important. When your nymph moves just like a real bug, trout are much more likely to bite.
Some nymphs drift freely in the current, while others hang out near the bottom among rocks and debris. Matching this behavior by using more or less weight, or adjusting your depth, makes a big difference in how successful you’ll be. Experiment with these details on the same stretch of river so you learn what works on any given day.
Reading Water: Where to Nymph for the Best Results
Even the best nymph won’t catch fish if you’re not fishing where trout hang out. Look for spots where the current slows down—like behind rocks, in seams where fast and slow water meet, at the head or tail of a pool, or under overhanging bushes. These places give trout cover and bring food their way.
One tip I swear by: If you’re not sure where the fish are, just watch for a while. You might spot a flash from a turning fish or see bubbles or floating debris moving in a steady lane. These are clues that you’re in the right spot for nymphing.
Choosing Nymph Flies: Patterns That Catch Fish
Here are some nymphs that always end up in my box. If you’re building your first nymph collection, these patterns are worth checking out:
- Hare’s Ear Nymph: Super buggy, matches all sorts of insects.
- Pheasant Tail Nymph: Slim and realistic, great for mayfly nymphs.
- Copper John: Shiny and heavy, good for getting deep in fast water.
- Prince Nymph: Flashy, stands out in high water or murky conditions.
- Zebra Midge: Tiny and simple, matches midge larvae and pupae, especially in winter.
Pick a range of sizes, from about size 18 (tiny) up to size 12 (a little bigger). Gold, copper, brown, black, and olive all work well. You don’t need a ton of variety to start; just a handful of the classics in a few sizes is plenty.
Rigging Up: Setting Up a Simple Nymphing Rig
Getting your nymph rig set up properly is pretty important, but it’s not complicated. This is a classic rig that works for almost any beginner:
- Tie your fly to your tippet with an improved clinch knot—it’s easy and strong.
- Pinch one or two split shot about 6 to 10 inches above your fly. This helps your fly sink quickly and drift naturally.
- Add your strike indicator about 1.5 to 2 times the depth you expect to fish. For example, if the water is 3 feet deep, put your indicator 4 to 6 feet above your fly.
If you want to double your odds, you can tie on a dropper fly about 12 to 18 inches below your first fly, usually a smaller or different color nymph. This is called a two fly rig, and it’s a favorite with beginners and pros alike.
Strike Indicators: How to Spot Bites Underwater
Strike indicators help you spot the bite, since real fish often eat gently and you’d never feel it through the rod. Foam balls, stick on indicators, or even a bit of bright yarn all work just fine. Place your indicator so your nymph drifts just above the bottom. If you’re not snagging now and then, you’re probably too high. Adjust often, and don’t be afraid to make quick changes until you find the right depth.
Getting Down to Depth: Using Weights Effectively
Water depth and current speed affect where nymphs and trout sit, so adding weight is super important. Too little and your fly just floats; too much and it sinks too fast or hangs on rocks. Adjust your split shot until your flies tick the bottom every few drifts. Start with a small shot and add more if you’re not touching the bottom. On days when the river is high or fast, you’ll need more weight; in slow, shallow water, use less.
Making the Perfect Drift: Presentation Tips
The way your nymph moves is super important. A dead drift, where the fly drifts naturally with the current and nothing else, is what you’re aiming for. Cast upstream at about a 45 degree angle, put a little slack in your line after it lands, and follow the indicator downstream with your rod tip. Mending, or lifting and flipping your line upstream, keeps your fly drifting naturally. Even a little drag or unnatural movement can put off picky fish.
I still remember my first trout on a nymph. The indicator paused, I set the hook, and boom, fish on. That perfect drift really does pay off when you see a trout make that subtle grab.
Setting the Hook: Reacting to Strikes
Any time your indicator twitches, stops, or drifts oddly, lift your rod smoothly. Trout often take and spit out a nymph in a split second, so you can’t wait around. A gentle lift (not a big hookset like you’d use for bass) is all it takes. Losing a few fish at first is normal, but with practice, you’ll get better at reading subtle bites.
Troubleshooting Common Nymphing Problems
- No bites: Change depth or add more weight. Fish deeper or try a smaller or larger fly.
- Snagging too much: Use less weight, or raise your indicator a bit so the fly rides a little higher.
- Missing hookups: Set the hook at every bump or stop—it could be a fish. Don’t hesitate; it’s better to be quick.
- Twisted leaders or tangles: Shorten your dropper or use just one fly to keep things simple while learning the basics.
Don’t sweat mistakes; everyone hangs up on rocks or misses strikes when they’re learning. Keep trying new approaches, and you’ll improve every outing.
Nymphing Styles: Classic, Euro, and Tight Line
There are a few different nymphing styles once you’re ready to branch out. Here’s a quick breakdown:
- Classic Indicator Nymphing: The go to style for beginners. Uses an indicator, weights, and usually one or two nymphs to cover many types of water.
- Euro Nymphing: Uses a long rod and very thin line, no indicator, relying on feel and line tension to detect bites. Super sensitive and effective, especially in clear or heavily fished water.
- Tight Line Nymphing: Similar to Euro, but works well with regular fly rods—just keep a straight connection between rod tip and fly, holding your line off the water for better control.
I usually recommend starting with indicator nymphing, then trying Euro or tight line once you’re more confident and want to sharpen your technique. Mixing these up adds more tools for tough days.
Nymphing Safety and Stream Etiquette
Wading rivers while focused on your indicator can be distracting, so always watch your footing and use a wading staff if you’re in fast or rocky water. Give other anglers space and avoid crowding spots that are already busy. Respect local catch and release rules, and always clean up any split shot or packaging before heading home.
Wearing a good pair of wading boots with solid grip helps avoid slips, and layering properly gives you comfort regardless of the season. A small pack keeps your extra flies and tippet close by. If you’re new to a river, consider asking at the local fly shop for tips on safety, hatches, and regulations.
Advanced Tips for Getting More from Nymphing
Once you’re comfortable, try these tips to get even more out of your nymphing sessions:
- Fish different sections of the river—tails of pools, undercut banks, or pocket water behind boulders.
- Change flies often if you’re not getting bites. Even a small change in size or color can trigger fish.
- Mix up your drift speeds. Sometimes a slightly faster or slower drift is all it takes for a shy trout.
- Nymph through riffles as well as deeper pools; trout in shallow water can be less wary and more aggressive.
- On tough days, use smaller tippet (down to 6X) for picky trout and try more natural or subtle presentations.
Don’t forget to take a step back and watch how insects move in the water next time you’re out. Noticing those little details helps fine tune your game. Carry a small seine or mesh net to check what’s drifting in the current, and match your nymphs for even more success.
Popular Nymphing Locations: Where This Technique Shines
Nymphing works anywhere trout live, but it really shines in certain places:
- Small to medium rivers with plenty of current seams and depth changes.
- Deep pools and slower runs where fish can hold and wait for food.
- Silty or rocky bottomed creeks where insects hide under rocks and debris.
- Lakes or ponds—yes, lake nymphing with a slow retrieve is awesome too!
If you’re not sure where to try nymphing, poke around your local streams and look for riffles, the tails of big pools, or the upstream edges of rocks. These spots are almost always worth checking out and often hold fish that are ignored by dry fly anglers.
Building Confidence: Why Practice Makes a Huge Difference
Nymphing takes a bit of patience, and the first few trips might feel slow compared to flashy dryfly fishing. Stick with it—reading subtle strikes and getting your flies in the right zone gets easier with every cast. I always find the more time spent on the water, the more natural this style of fishing feels.
Paying attention to the small stuff—changing weights, mending your line, trying new spots—pays off in the long run. Every day is different, and being flexible is really important for catching fish consistently.
The more you get used to nymphing, the faster you’ll see your catch rates go up. Keep a journal of what flies and setups work; that way, you’re not guessing the next time you hit the river.
Common Questions (FAQs)
What size nymph flies should I start with?
Start with sizes 14 to 18. These cover most insects in rivers and are easy to cast and see. Go smaller or larger as needed for your local water or if fish are picky.
How do I know if my fly is deep enough?
You’ll know you’ve got the right depth when your indicator occasionally stops or ticks on the bottom. If you’re not hitting bottom now and then, add weight or adjust your indicator higher.
Can I use nymphs year round?
Absolutely! Nymphs catch fish in every season. Fish may switch up what they eat, but there’s always some kind of nymph or larva drifting in the water, even in winter.
What’s the easiest way to avoid tangles with a two fly rig?
Tie your dropper fly off a short section of tippet from the bend of your main fly’s hook. Keep droppers no longer than 12 to 18 inches and use slightly heavier tippet for the upper fly if tangles are a problem.
How often should I change my nymph pattern?
If you go 20 to 30 minutes with no bites, try changing fly size, color, or weight. Small changes make a big difference in matching what trout want that day.
Final Thoughts
Nymphing opens up a ton of fishing opportunities for beginners, and you don’t need much to get started—just a rod, a few nymphs, and some basic rigging skills. Pay attention to clues from the water, practice your drift, and adjust as you learn. Nymphing can feel tricky at first, but it quickly becomes one of the most reliable and rewarding ways to catch trout. Enjoy your time on the river and have fun learning this awesome fly fishing style. Good luck!

Understanding The Different Types Of Waders And Boots

Best Eco-friendly Fly Fishing Gear For Beginners

What Is the Best Sealant To Repair Waders? Add Active Years
About Author
